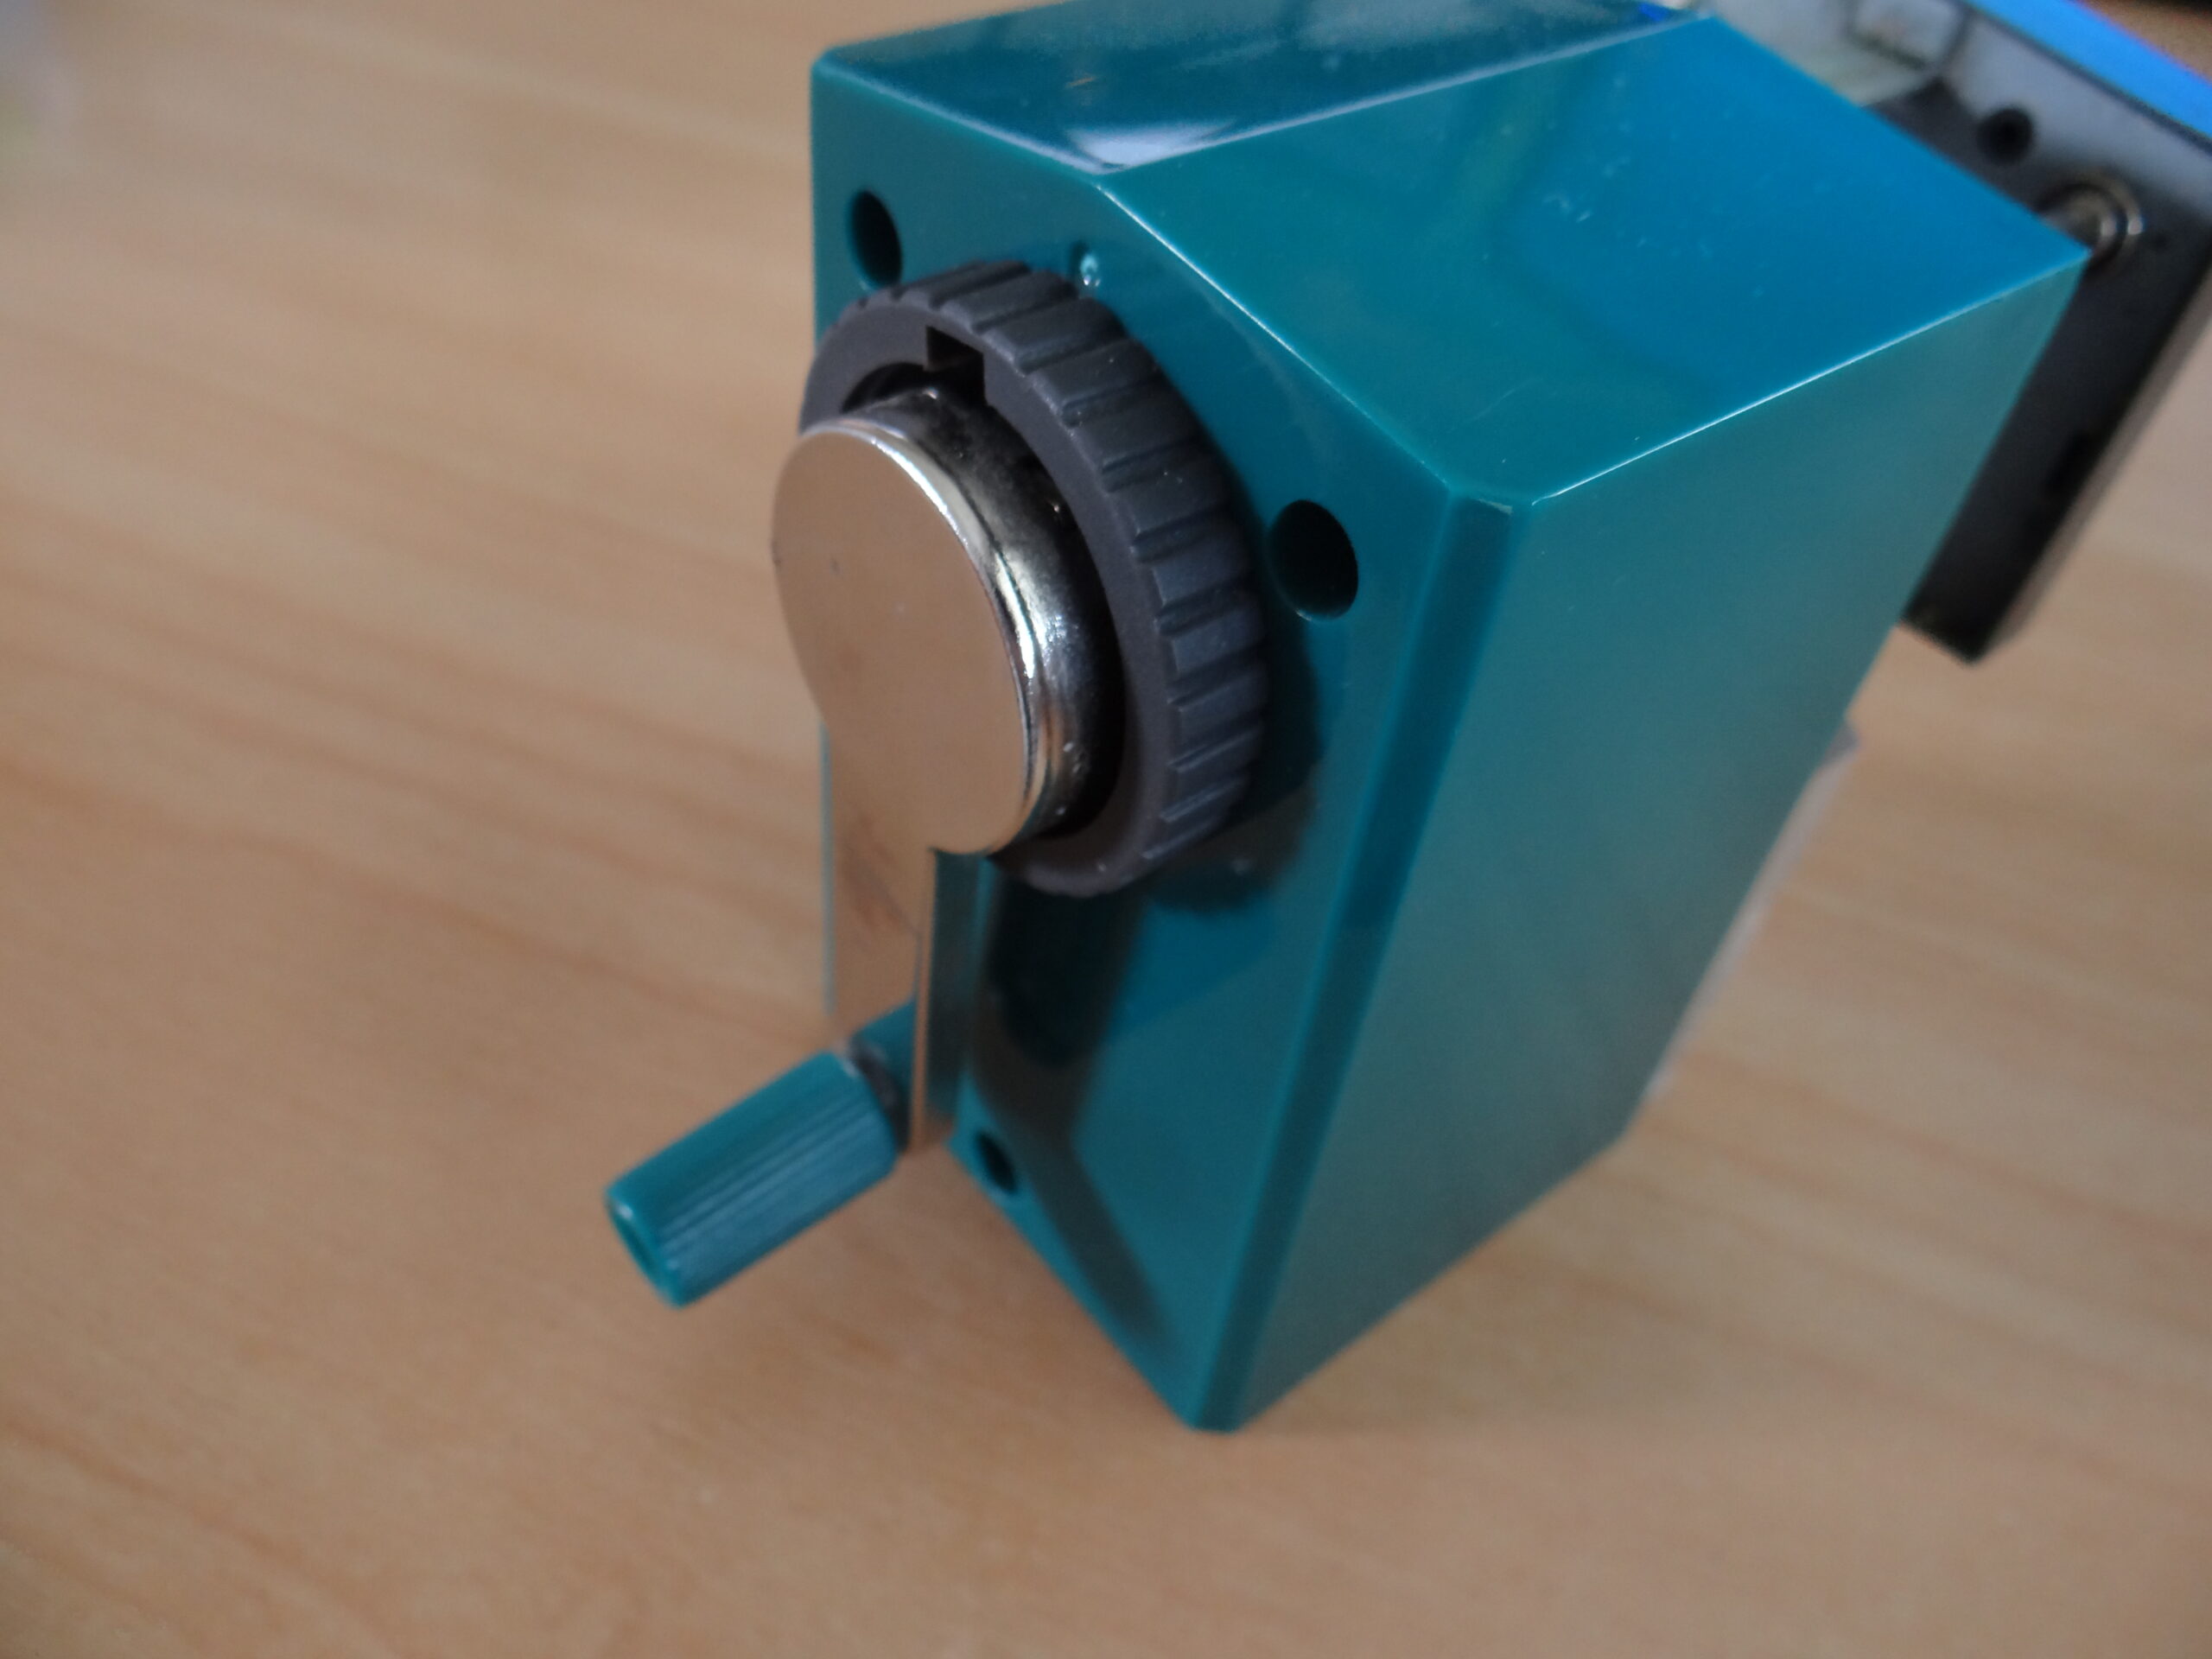
Figure 1: Our KW-triO model 0305A sharpener, showing the handle.
We have a range of pencil sharpeners at Easyink. I have this particular KW-triO 0305A sharpener at home (see Figure 1), which makes life much easier when the kids have vast quantities of pencils between them of various kinds.
But…it’s awesome, I love it, the kids use it, it makes a very fine point….and I didn’t know how to use it properly for an embarrassingly long time! My mechanical engineer-brained husband had to show me how to use it properly and was shocked that I hadn’t learned to use one back in school in the 80s and 90s (yep, don’t do the maths please!).
I found it difficult to find good info online about these, and they don’t come with instructions from the manufacturer. I did find a useful video on YouTube covering various types of sharpeners though…
In this video, a number of different sharpeners are reviewed including a similar type to our KW-triO mechanical sharpeners (the ones with handles that you turn).
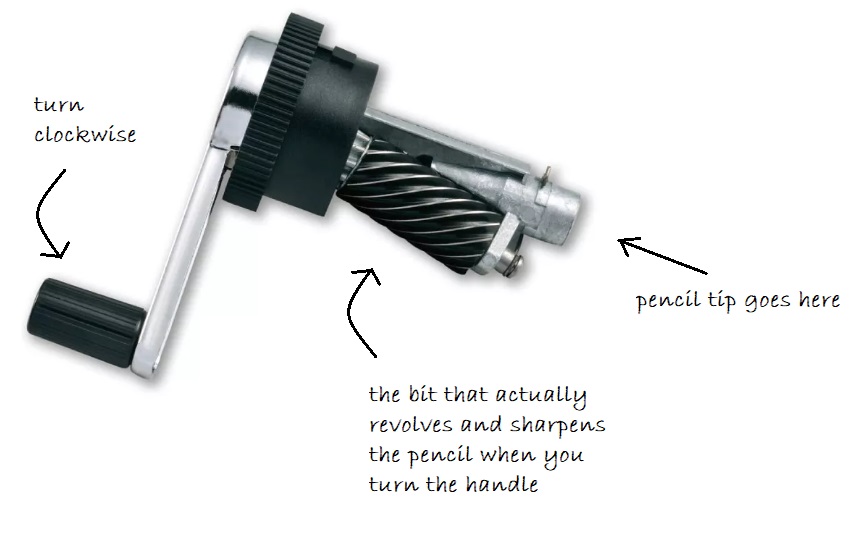
Figure 2: The mechanism inside a KW-triO mechanical sharpener.
If you follow this link the video should start at the relevant point about 8 minutes in.
It shows how you can remove the mechanism to unjam any bits if needed, and KW-triO Desktop Pencil Sharpener Adjustable Fit Blue disassembles similarly. The KW-triO Desktop Pencil Sharpener Green also should work exactly the same. Figure 2 shows you what the inside bit that does all the work looks like!
So, in case anyone else has similar old-school mechanical sharpener issues and would like a clear written explanation with pictures….(and really, sometimes you just don’t have the time to watch videos to learn things)….here are some photos and instructions.
- Insert pencil:
- Push and hold button on the front (opposite side to the handle) which opens the pencil grip.
- Pull front panel towards you, and insert pencil into the grips and all the way into the hole in the front of the sharpener – this aligns the pencil with the sharpening mechanism inside, keeps it straight, and pulls it slowly into the sharpener as it is sharpened.
- Figure 3 shows a pencil ready for sharpening.

Figure 3: Our sharpener with one of our Icon pencils inserted, ready for sharpening.
- Turn handle clockwise
- If you turn the other way, you’ll hear whirring but nothing will happen!
- If you turn the right way, you will feel the mechanism working on the pencil and the pencil will be drawn into the sharpener until it is sharpened, when it seems to start spinning freely.
- Remove the pencil
- Push button in again and take pencil out – if it hasn’t already gone all the way back in contact with the sharpener body, the front panel that held the pencil will ping back into place.
- Avoid accidentally stabbing yourself with your newly sharpened pencil (Figure 4)!
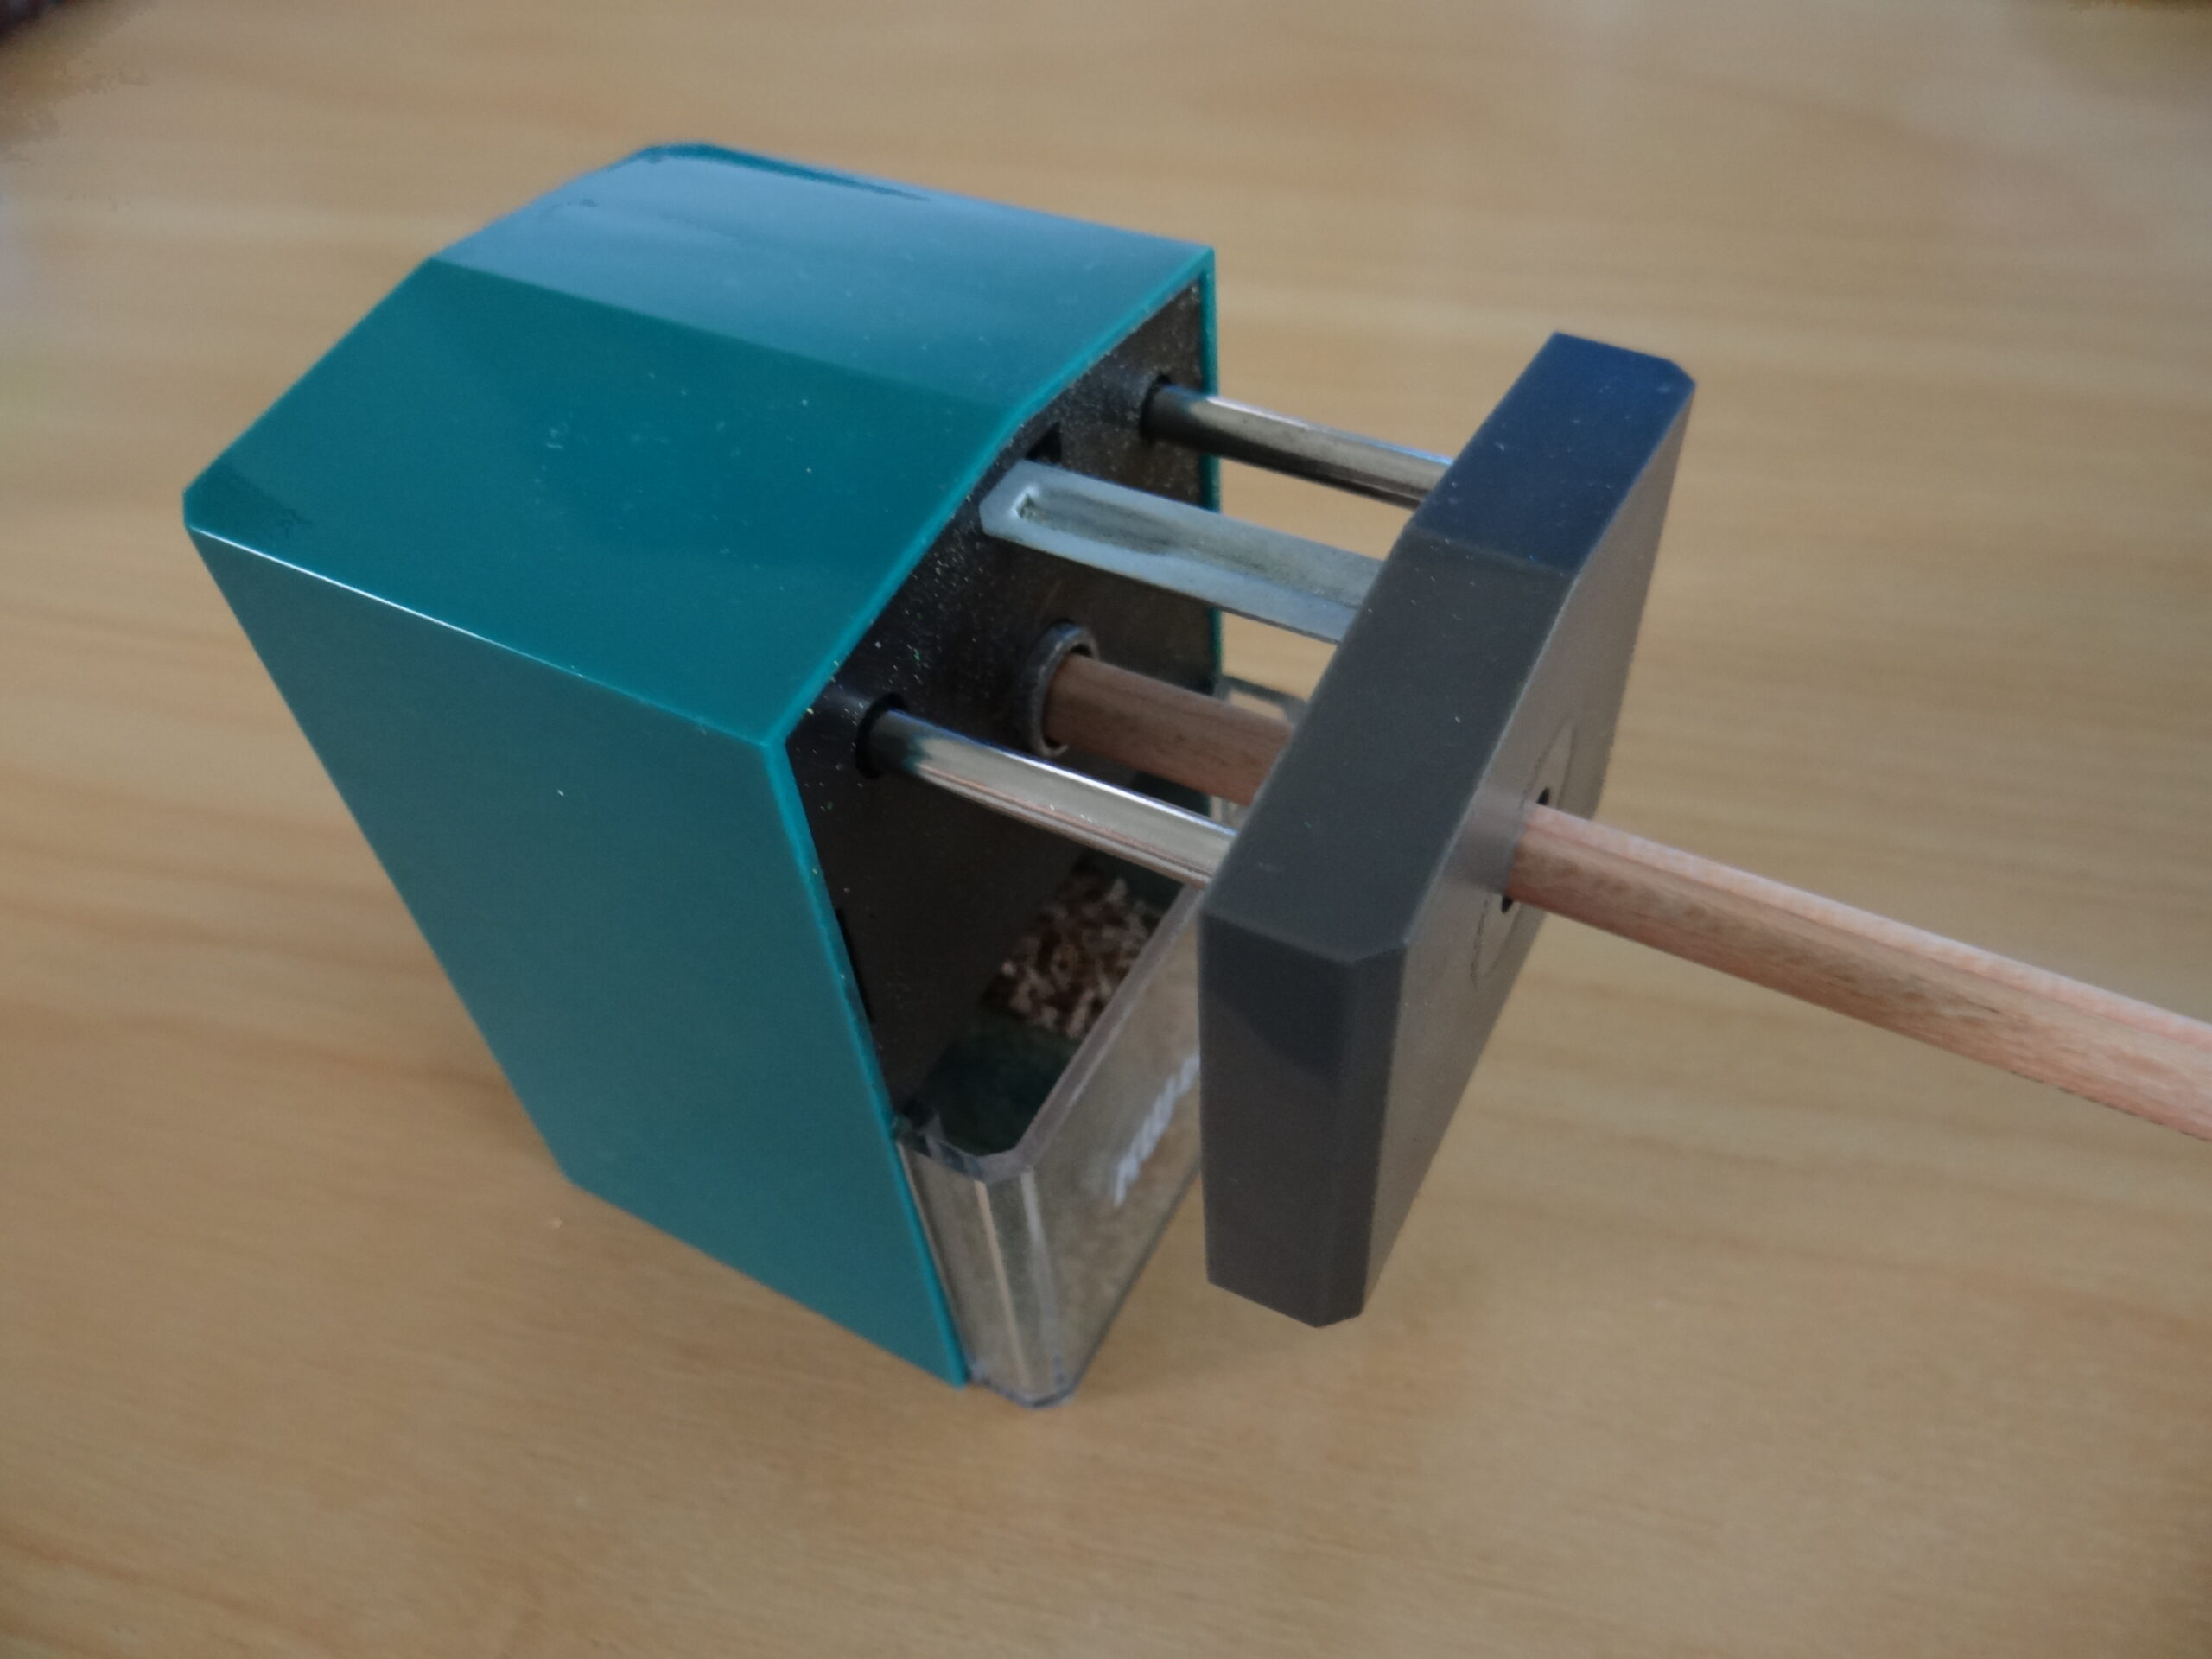
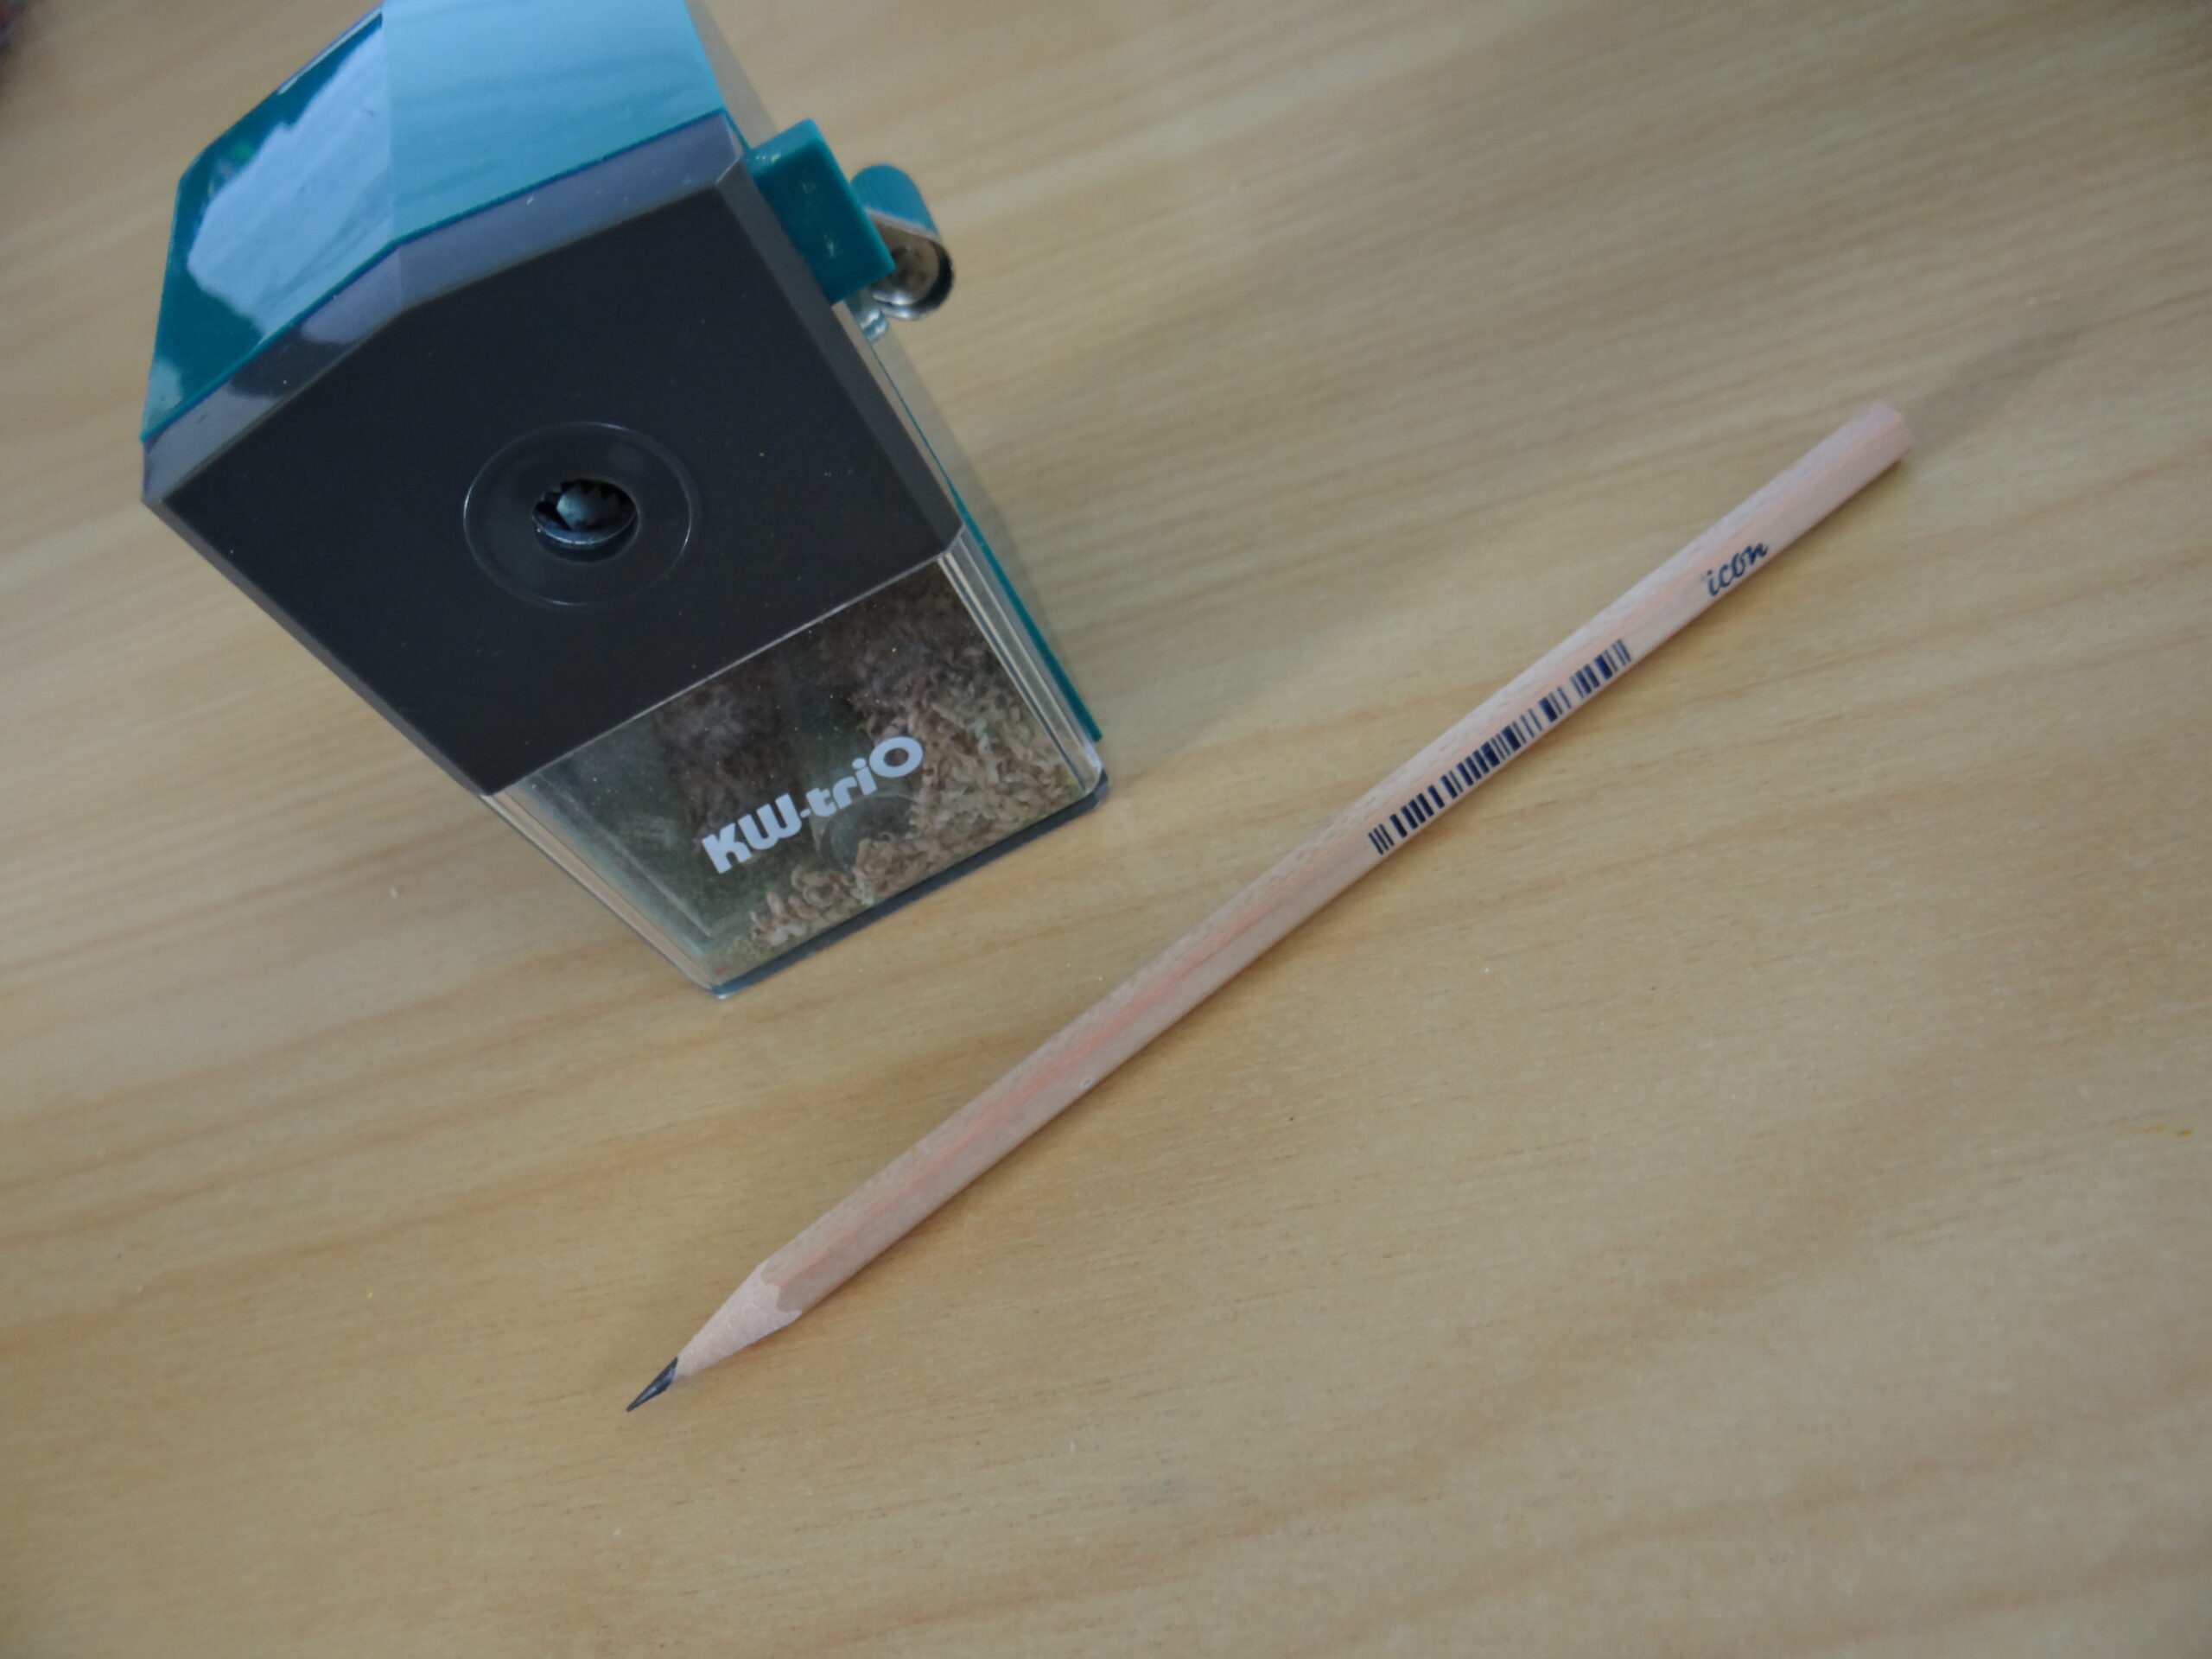
Figure 4: Photo of the front of our sharpener with the front panel and pencil grip back in position after sharpening and the extremely sharp newly-sharpened pencil!
This sharpener seems to do an amazing job on our writing pencils and usually works well on our coloured pencils too. I’ve had some coloured pencils not do so well – they did get sharp but it was hard work and I think more was removed than necessary – it’s possible these pencils were the ones our toddler gave a bath, a year or two back….